8.4.08
CP Update a Child’s Accepted Enrollment Record
Every year, enrollment records for returning children are rolled over to the upcoming program year.
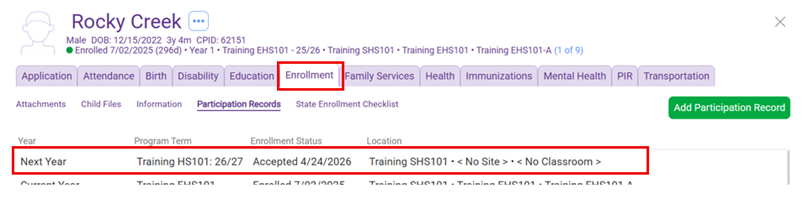
All enrollment records are Accepted to <No Site>, <No Classroom>
When families decide on their 1st and 2nd location choices for the new program year, the Family Worker or Home Visitor updates the child enrollment record in ChildPlus.
Follow the steps below to modify an existing accepted site, classroom, location preferences.
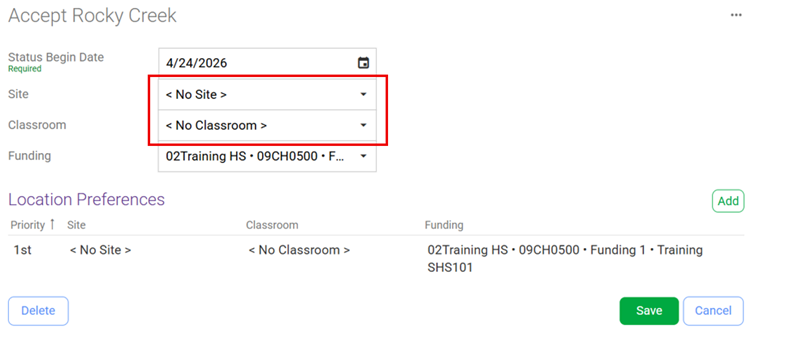
Update “Accepted” Site and Classroom
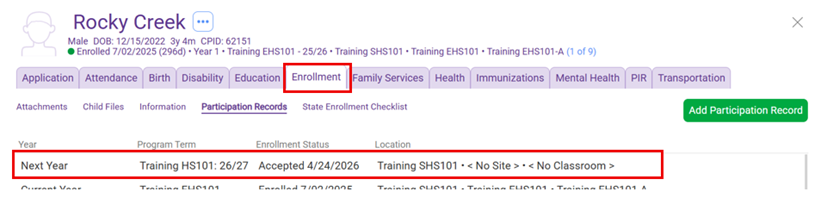
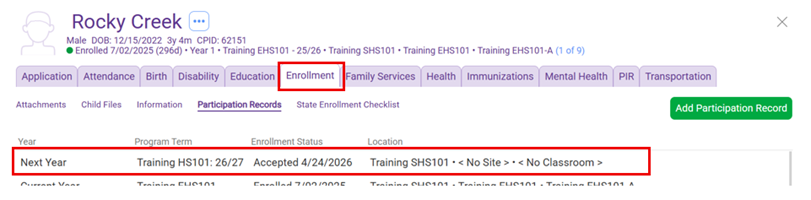
- Select “Services” and select the relevant child’s name in your participants list or use the search field above the participant list
- On the participant’s enrollment record, click the Next Year enrollment record
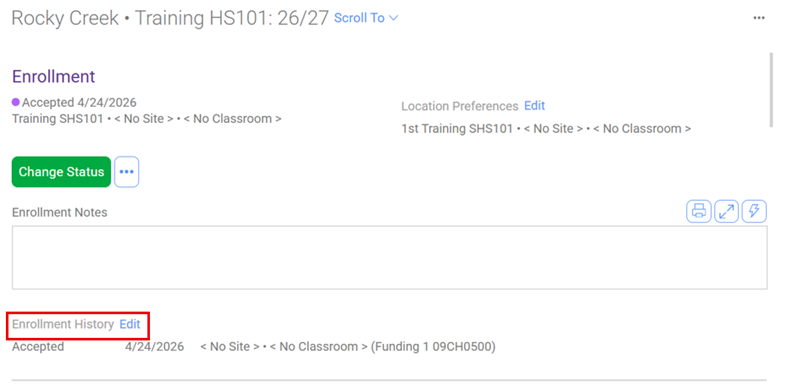
3. Next to “Enrollment History” click “Edit”
4. Select the “Accepted” status
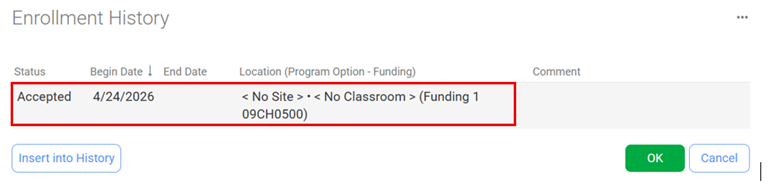
5. For ELIGIBLE children, update their “Site” and “Classroom” to the family’s 1st location choice by using the drop-down lists
-
- OVER INCOME children, leave them accepted to “<No Site>” and “<No Classroom>” and proceed to “Add Location Preferences”
- Note: The “Classroom” field may be left blank if there are multiple classrooms
6. Click “Save”
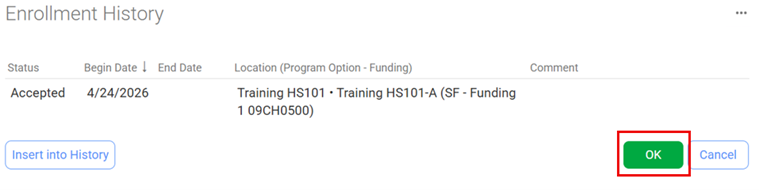
7. Then click “OK” on “Enrollment History”
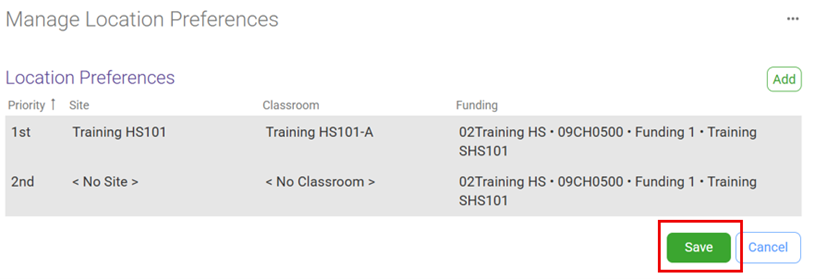
Add Location Preferences
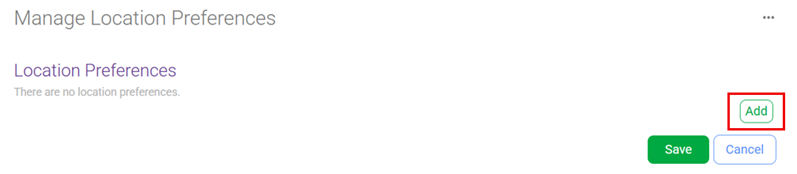
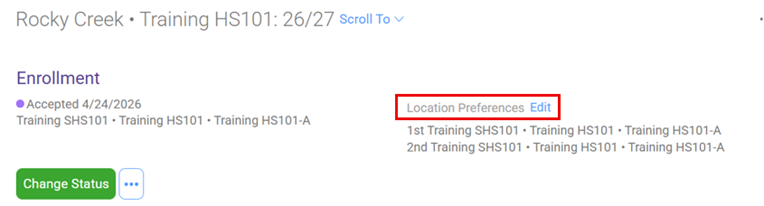
- Click “Edit” next to “Location Preferences” in the enrollment record

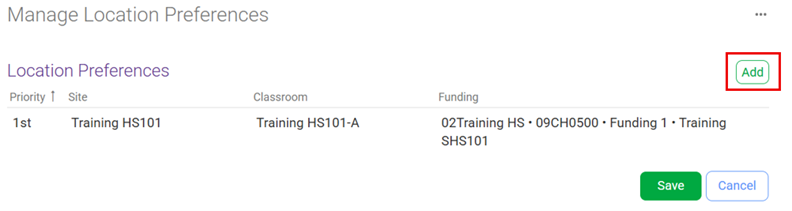
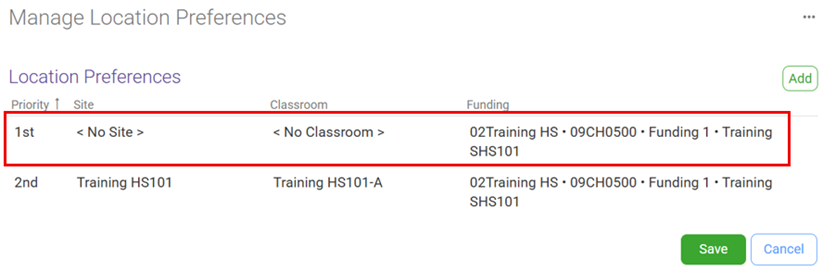
2. In the “Manage Location Preferences” window, select “Add”
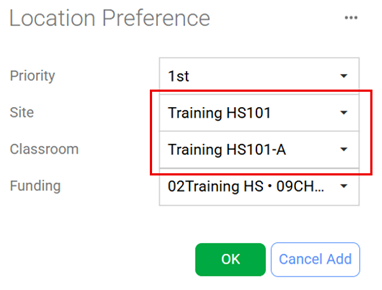
3. Select the “Site” and “Classroom” for the family’s 1st location choice from the drop-down lists
-
- Note: The “Classroom” field may be left blank if there are multiple classrooms
4. Click “OK”
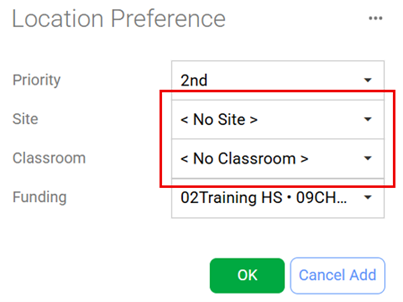
5. If the family has a 2nd location choice, in the “Manage Location Preferences” window, select “Add” again
6. Select the “Site” and “Classroom” for the family’s 2nd location choice from the drop-down lists
-
- Note: The “Classroom” field may be left blank if there are multiple classrooms
7. Click “OK”
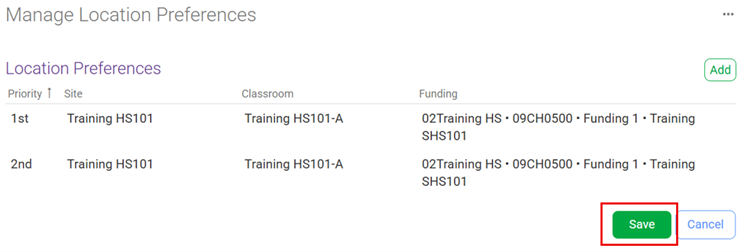
8. Once you have updated the location preferences, click “Save” on the “Manage Location Preferences” window
-
- Note: Families may choose a maximum of two locations
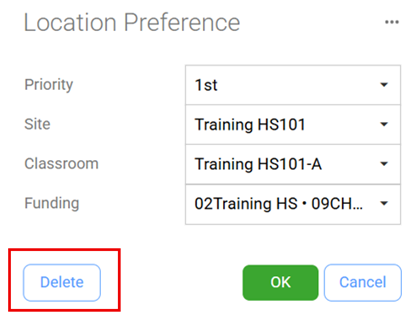
Delete Location Preference
- Select “Services” and select the relevant child’s name in your participants list or use the search field above the participant list
- On the participant’s enrollment record, click the Next Year enrollment record
3. Click “Edit” next to “Location Preferences” in the enrollment record

4. In the “Manage Location Preferences” window, select the location preference you want to delete

5. Click “Delete” to remove the location preference
Change Location Preference Order
- Select “Services” and select the relevant child’s name in your participants list or use the search field above the participant list
- On the participant’s enrollment record, click the Next Year enrollment record
3. Click “Edit” next to “Location Preferences” in the enrollment record
4. In the “Manage Location Preferences” window, select the location preference you want to change
5. Select “Priority” drop-down list and change. (e.g. change the 1st choice to 2nd choice)
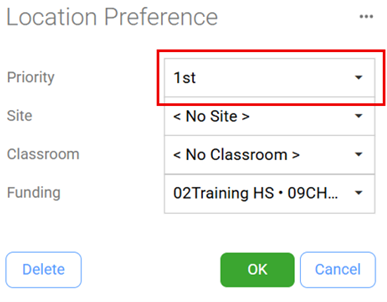
6. Click “OK”
7. Reorders the 1st and 2nd priority location preferences
8. Click “Save”