Print the Admissions Packet
Print the Admissions Packet
If you have not received the Admissions Packet from the Family Services team (e.g., at the beginning of the program year), you can print it from ChildPlus.
Note: Load the printer with blue paper in the side multi-purpose tray for your coversheet before printing the Admissions Packet. You can also just print it all on white paper and copy the coversheet on to blue paper afterwards. Be sure to shred the white copy if you do this.
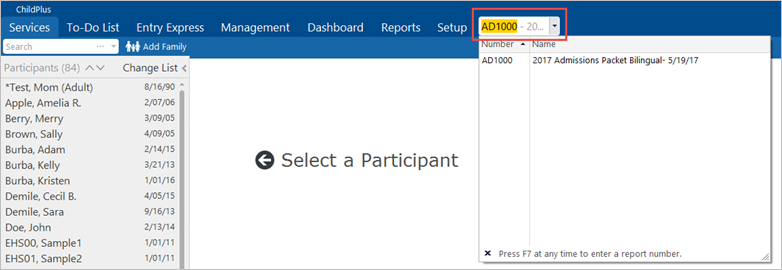
- In the Enter Report # field, type “AD 1000.”
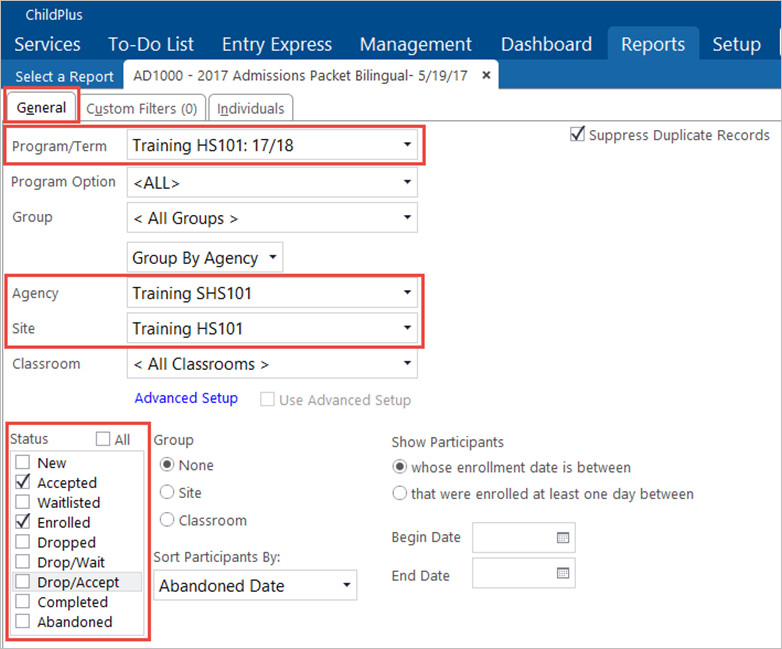
On the General tab:
- Select the relevant Program/Term (EHS, HS, or State; and the program year).
- Select the relevant Agency (“Shasta Head Start Child Development,” or “State CCTR/CSSP.”)
- Select your
- In the Status field, select the Accepted and Enrolled
- Click the Individuals
- Click the Uncheck All checkbox to deselect all the children’s names. Then, select the child(ren) for whom you wish to print the admission packet.
- Click Preview.
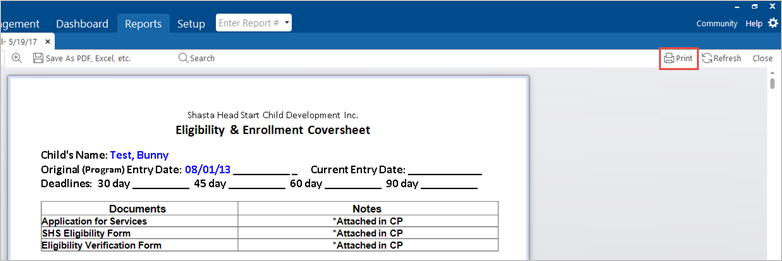
- Click Print.

- Click Print from the preview page.
On the Print Properties screen:
- Click the Basic tab on the left side.
- In the Duplex section, select the Flip on Long Edge radio button.

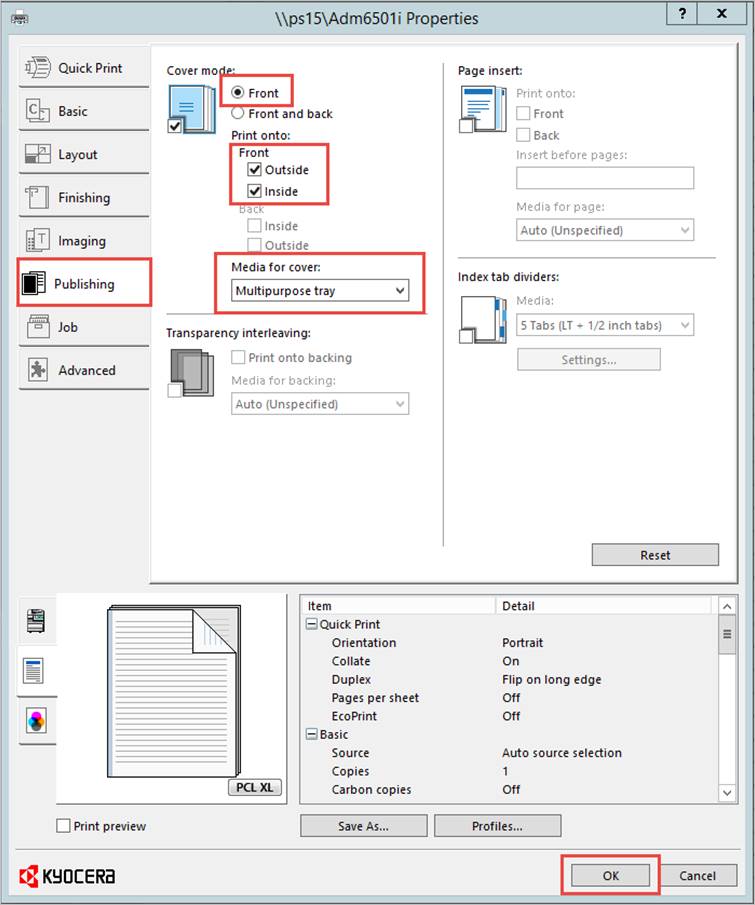
- Click the Publishing tab on the left side.
- In the Cover Mode section, select the Front radio button. Then, click the Outside and Inside
- In the Media for Cover field, select “Multipurpose Tray” from the dropdown list.
- Click OK. The Admission Packet is sent to the printer.
Note: The printer should beep until you have loaded blue paper in the multipurpose tray.